Customers come to your establishment, scan a QR code sticker, get acquainted with the contactless menu, order, and pay at the table. At any time and without waiting for the waiter. Fast, clear, and convenient. All this can be done thanks to the flexible Stravopys settings interface.
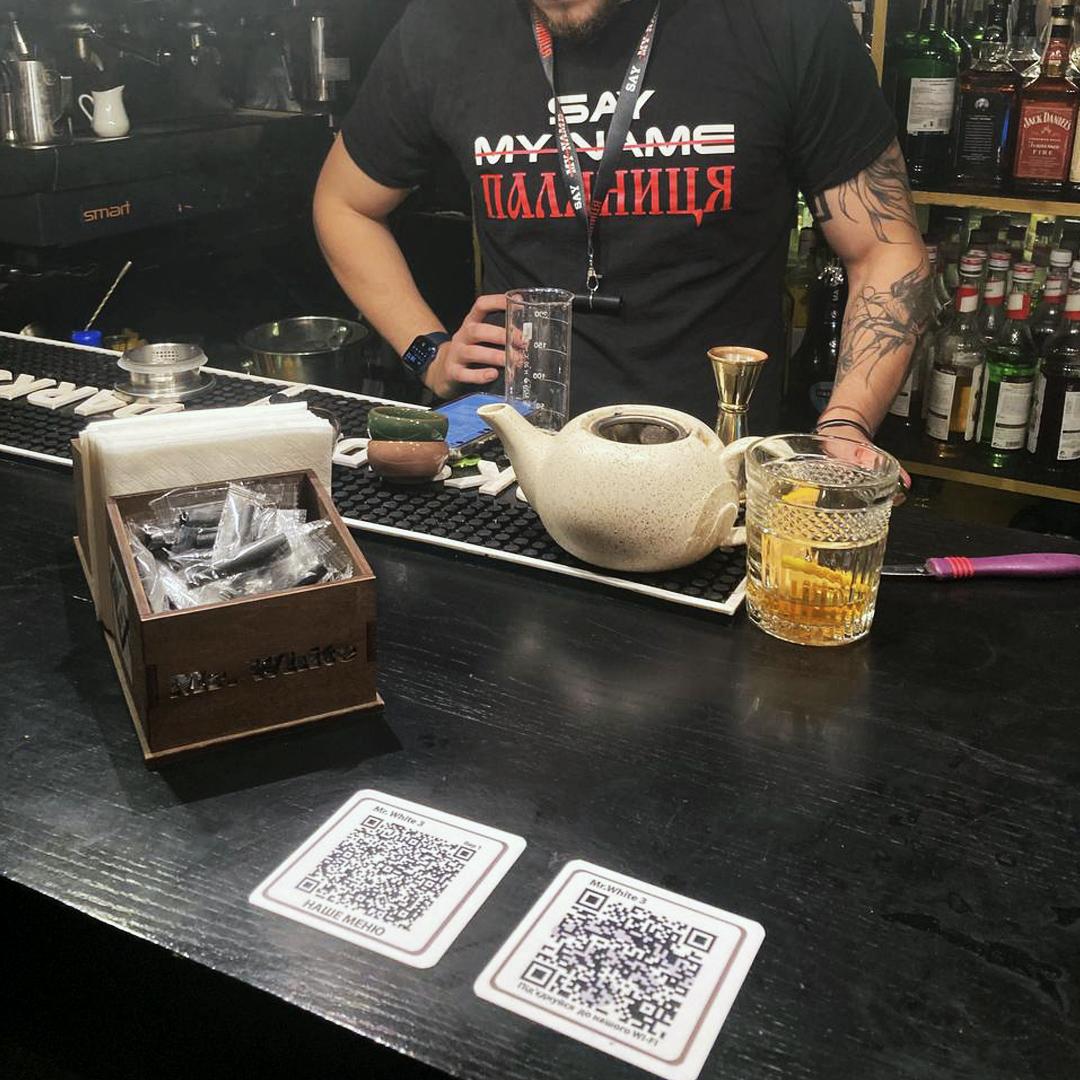
This article shows how to create a unique QR code sticker, order, and pay on a table. It is an extension of the previous article "Setting up fields for orders", which is optional, but for a general understanding of the features of Stravopys, we recommend that you read it before starting the following steps.
To adapt the order form and specify the required field with the table number in it, do the following:
- Open the admin panel.
- Go to "Order settings" (1).
- Locate the main section and make sure the "Allow taking orders" toggle is enabled.
- Find the section with form fields.
- Leave the "Apartment, floor" field enabled (this is a special field participating in the generated QR code with pre-filled information). In the following steps, the name of this field will be changed. We do not need all other fields and it is better to disable them.
- Below there are "Order Form Comment" (text that customers will see before ordering) and "Confirmation Details" (text that customers will see after ordering along with a thank you and confirmation) (2). Use them to provide customers with more information, such as "We'll be back shortly to finalize order details."
- Save changes (3).
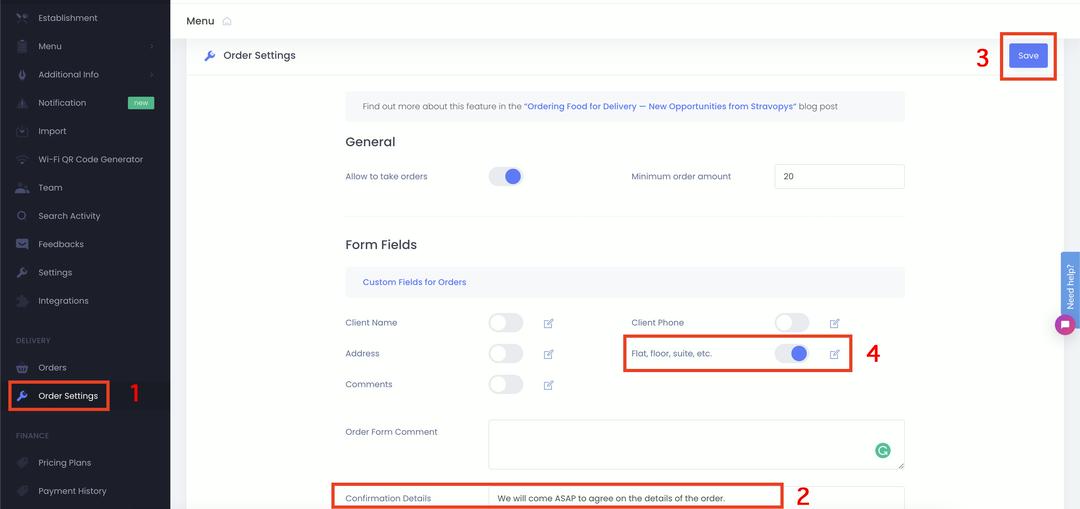
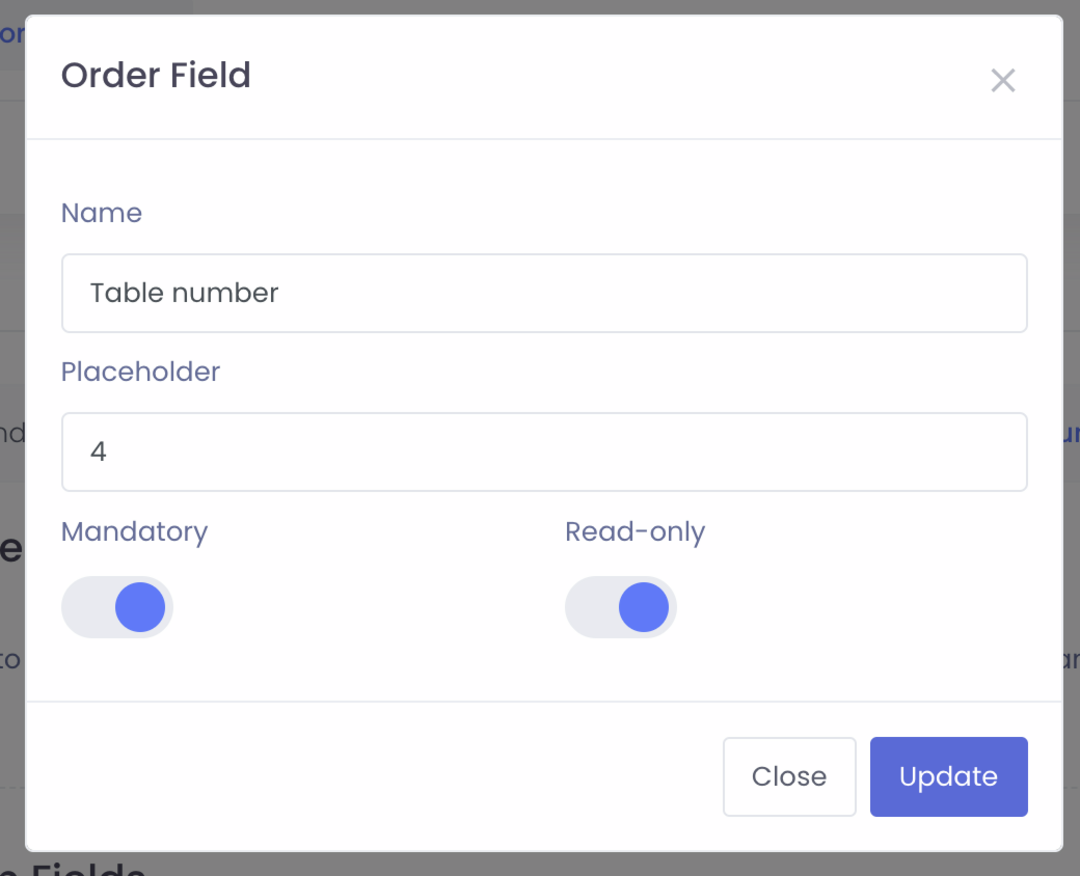
- Click on the edit icon next to the "Apartment, floor" field (4) to open the edit form with additional settings.
- Change the name to "Table number".
- Change the clue, for example, to the number "4".
- Specify the field as "required".
- Set the field as "read-only" if you want to prevent clients from changing it.
- Save the form.
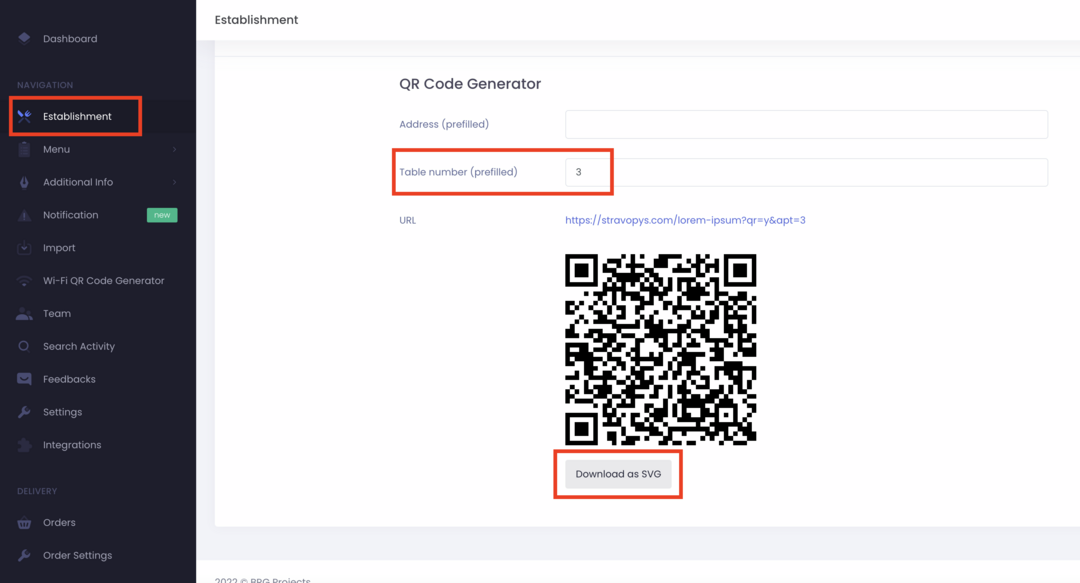
Now let's create the required number of QR codes on tables for the contactless menu:
- Go to the establishment settings.
- Find a place to generate a QR code sticker.
- Find the "Table number (prefill)" field.
- Enter the table number (the QR code should automatically update).
- Save the updated QR code.
- Scan the QR code with your phone and place a test order to make sure everything works as it should.
- Repeat the operation for other tables.
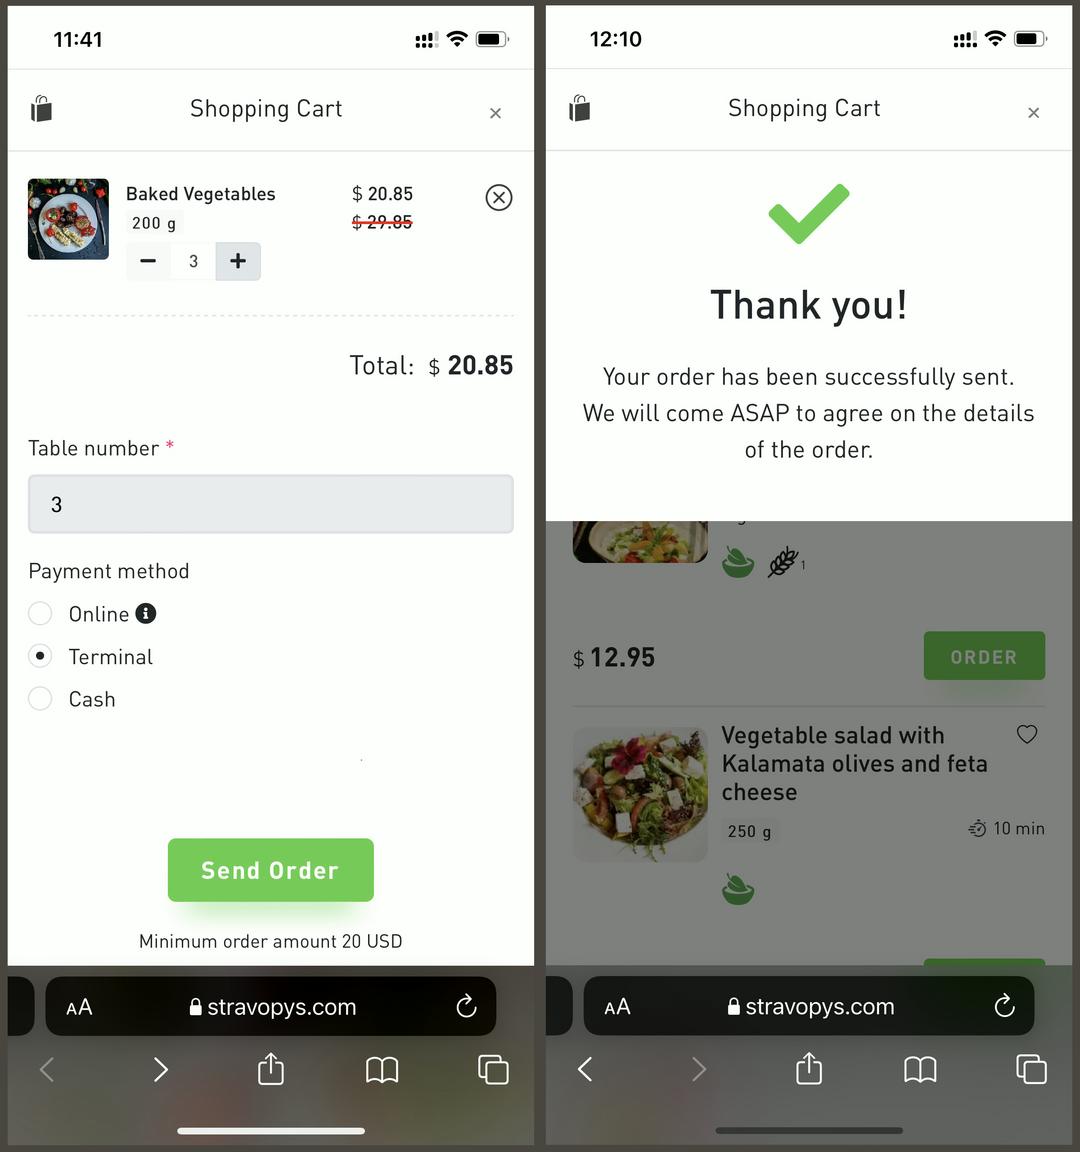
All necessary technical steps have been taken. Further, optionally, designers can take care of the aesthetic appearance of QR code stickers, for example, by adding decor, table numbers, etc.
After that, all that remains is to print the generated QR codes and place them on the clients' tables for contactless orders.

